Summary
This phase oof the project serves as an exploit step into the web development field, learning about the different platforms, stacks and languages that are required in order to build my project
Related Sections/Pre-Reading
Content
Alright, so this phase was basically me, a total web dev newbie, diving headfirst into the wonderful (and super confusing) world of web development stacks. My journey started with Google. And let me tell you, five minutes in, I was drowning in terms like “full-stack,” “backend frameworks,” and “middleware.” It was like trying to learn a new language but with no dictionary in sight.
For a hot second, I thought about taking the easy way out with drag-and-drop platforms like WordPress or Squarespace—super tempting! They promised to have me up and running in no time, no coding required. But then I realized: ObsCanFeedYou deserves better. Plus, the challenge sounded…kind of fun? Maybe?
This is where my software engineer roommates came to the rescue. After watching me struggle in silence (and probably toying with how long I’d last), they finally suggested I look into the T3 stack. Apparently, it’s the thing for someone trying to build a serious project without having to learn rocket science. And honestly? It sounded cool. So I was in
T3 Stack
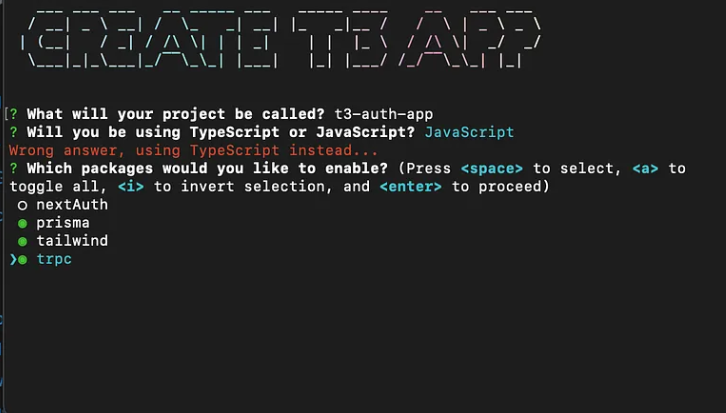
The T3 stack is this collection of tools that work together to make web development a bit easier
-
React
React is this tool for building websites in parts, or “components.” Instead of coding everything as one giant mess, I can split the site into little pieces (like a header, a button, or a card) and just reuse those pieces wherever I need them. If I need to update a button, for example, I can change it once, and React will update it across the whole site. It’s like playing with building blocks instead of having to carve out each piece every single time. -
Next.js
Next.js takes React and makes it even more useful. So, React builds the pieces of the website, but Next.js helps set up the entire layout and lets me add extra functionality. It handles things like loading new pages quickly or setting up the back-end stuff without needing extra servers. -
Tailwind CSS
Tailwind CSS is my “styling” tool, which means it makes the site look pretty. Normally, I’d have to write a bunch of custom code to style everything, but Tailwind comes with pre-made classes that I can just add directly to my HTML. So instead of thinking, “I want this button to be blue,” I just type “bg-blue-500,” and Tailwind knows what to do. It’s like having a set of stylish outfits that magically fit the site perfectly.
Development and Deployment Environments
Creating a website is one thing, but my roommates insist that a key step at the beginning of any project is deciding where I’ll actually develop it and test its deployment.
So, as I understand it, deployment is basically pushing your site online to a server that isn’t your computer. Here’s the catch: a website might work perfectly fine when running locally (just on your laptop), but things can get tricky once it’s out in the wild on the internet. Different environments can lead to unexpected issues, which is why best practice is to regularly develop and test both on your laptop and the deployed version.
After a bit of research (and a lot of trial and error), I decided to do my deployment on Vercel—a platform that simplifies the process of getting my site online.